

The rich smell of freshly made cheese, the pure joy of crafting something delicious from scratch—it sounds fancy, maybe even a bit scary. Many home cooks believe making cheese is only for food experts with special gear and years of practice. But the truth is much simpler. With just a few basic things and easy steps, you can open up a world of homemade cheese that tastes as good as, or even better than, what you buy at the store. This guide will show you how simple and rewarding making your own cheese can be.
Forget the image of huge boiling pots and complicated cultures; at its heart, making cheese is just changing milk through simple steps of clumping and separating. From smooth ricotta to tangy mozzarella, the main actions are surprisingly easy. You might be shocked to learn that many popular cheeses can be made right in your kitchen without much fuss. Often, you'll only need a few things you probably already have or can easily find.
Whether you love food and want to try new things, or you're a beginner ready for a fun challenge, this guide is for you. We'll break down what you need, give helpful tips, and share the sheer delight of pulling your own perfectly shaped cheese from a cheesecloth. Get ready to find out that making cheese at home is not only possible but incredibly fun and surprisingly easy.
The Magic Ingredient: Understanding Your Milk
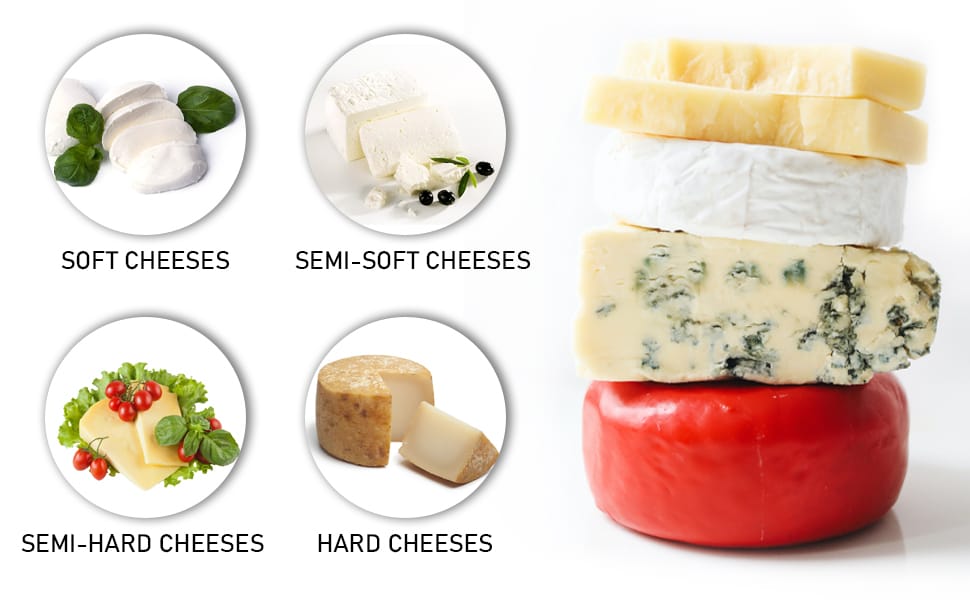
Milk Types and Their Impact on Cheese
Choosing the right milk is the first step when you're making cheese at home. Different milks bring different flavors and textures to your final product. Cow's milk is most common, giving you a wide range of cheeses from soft to hard. Goat's milk creates a tangier, often softer cheese, while sheep's milk leads to richer, creamier results.
The amount of fat and protein in your milk really changes the game. Higher fat content often means a creamier, richer cheese. The proteins in milk are what actually form the curd, so their structure helps define how firm or soft your cheese will be. Knowing your milk helps you pick the best one for the cheese you want to make.
Freshness and Quality: The Foundation of Flavor
Good cheese starts with good milk. Always choose the freshest, highest-quality milk you can find. Fresh milk has the best natural balance of bacteria and enzymes, which are important for flavor development. Using milk past its prime can lead to off-flavors or problems with the cheese setting.
Many beginners wonder about pasteurized versus raw milk. Most store-bought milk is pasteurized, meaning it's heated to kill bad bacteria. This works perfectly fine for most home cheese projects. Raw milk, which hasn't been heated, contains natural bacteria that can add complex flavors, but it also carries higher risks and is not legal to sell in some places. For safety and ease, pasteurized milk is a great starting point for making delicious homemade cheese.
Beyond Cow's Milk: Exploring Other Dairy Options
While cow's milk is a common choice, don't stop there. Goat and sheep milk offer exciting new flavors and textures for your cheese-making adventures. These milks can be a bit more expensive or harder to find, but they open up a whole new world of cheesy possibilities. You might find a favorite new cheese by simply trying a different type of milk.
Some folks even try to make "vegan cheese" using plant-based milks. While these can be tasty, remember that the process and end product will be very different from dairy cheese. Plant milks don't have the same proteins that naturally coagulate like dairy milk, so they need different thickeners and steps. It's a fun journey, but know it's a different path entirely.
Essential Tools for Your Home Cheese-Making Journey
Beyond the Basics: What You Actually Need
Making cheese at home doesn't require a kitchen full of gadgets. You probably have most of the basic items already. First, you'll need a large pot, usually 8 quarts or more, to heat your milk. A good kitchen thermometer is vital to hit the right temperatures, which are key for successful cheese. Don't forget cheesecloth—a loosely woven fabric that drains whey from your curds.
You'll also need a colander for draining, along with measuring cups and spoons for precise ingredients. These simple tools are your starting point, and they're all you need for many easy cheese recipes. With these in hand, you're ready to start your cheese-making adventure without breaking the bank.
Specialized Tools That Elevate Your Craft
As you get more into making cheese, you might want to add a few special tools. A pH meter can help you check the acidity of your milk and curds, which is super important for consistent results in more complex cheeses. If you plan to make hard cheeses, a cheese press can remove extra whey and create a firm block. Also, specialized cheese molds come in many shapes and sizes to give your cheese a professional look.
These tools are not needed for your first few batches of easy cheese. Think of them as upgrades for when you're ready to explore harder recipes and fine-tune your process. They can certainly help improve the quality and consistency of your homemade cheese.
Kitchen Hygiene: A Non-Negotiable Step
Cleanliness is super important when making cheese. Think of it as protecting your hard work. Any unwanted bacteria can spoil your milk or cheese, leading to bad flavors or even making it unsafe to eat. Taking time to clean your tools helps guarantee a tasty and safe end product.
Always wash your hands well before starting. Sterilize all your equipment that will touch the milk or curds. You can do this by boiling them for a few minutes or using a food-grade sanitizer. Making sure your workspace is spotless prevents contamination and ensures your cheese turns out just right.
Getting Started: Simple Cheeses for Beginners
The Effortless Ricotta: Creamy and Quick
Ricotta cheese is one of the easiest and fastest cheeses to make at home. It's often made from the whey left over from other cheese, but you can also make it directly from whole milk. You simply heat milk, add an acid like lemon juice or vinegar, and watch as soft curds magically form. These fluffy curds are then gently strained, giving you a fresh, creamy cheese in under an hour.
This mild, milky cheese is incredibly versatile. Use your homemade ricotta in lasagna, dollop it on toast with honey, or simply enjoy it with fresh fruit. Its simplicity makes it a perfect first cheese project, showing you how easy making cheese at home can really be.
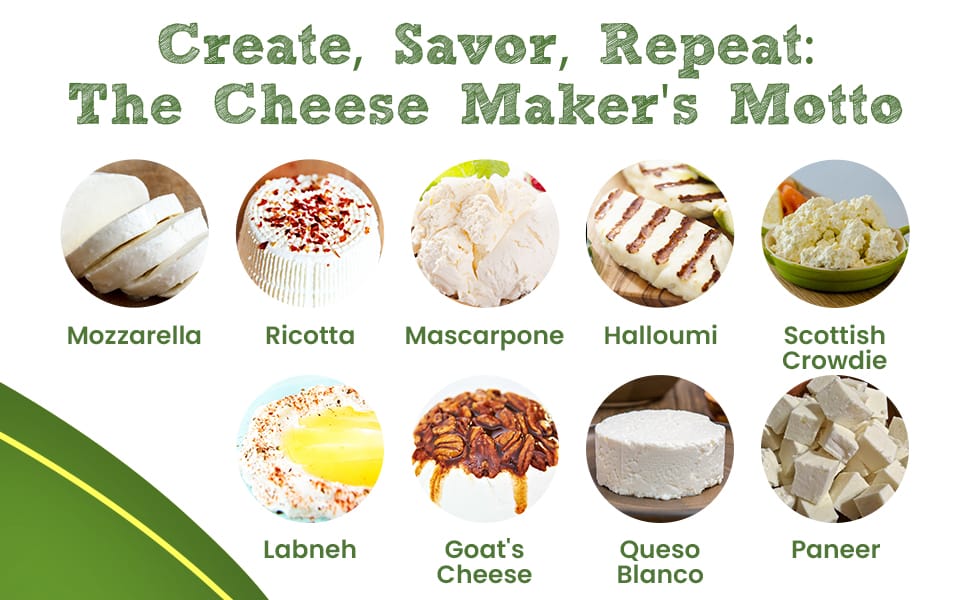
Homemade Mozzarella: Stretchy and Satisfying
Making fresh mozzarella at home is a truly rewarding experience, especially when you achieve that perfect stretchy pull. You start by heating milk, adding a small amount of citric acid and then rennet, which helps the milk set into a firm curd. Once the curd forms, you cut it, heat it gently in hot water, and then comes the fun part: stretching.
The key to great mozzarella is in this stretching process. You pull and fold the warm curds until they become smooth, shiny, and elastic. This develops its signature texture. Fresh mozzarella is amazing in salads, on pizzas, or simply sliced with tomatoes and basil. It's a little more involved than ricotta, but the result is a fresh cheese that tastes far better than store-bought options.
Paneer and Queso Fresco: Versatile, Mild Cheeses
Paneer and queso fresco are two other fantastic fresh cheeses for beginners. Both are acid-set cheeses, meaning they don't need rennet, making them super simple to prepare. For paneer, you bring milk to a boil, then add lemon juice or vinegar to separate the curds from the whey. The curds are then pressed to create a firm, non-melting block perfect for Indian cooking.
Queso fresco follows a similar path but is often less pressed, giving it a crumblier texture. This mild, salty cheese is wonderful for sprinkling over tacos, salads, or beans. Both paneer and queso fresco are ready to eat the same day you make them, proving that delicious homemade cheese doesn't always require a long wait.
Understanding the Key Processes: Coagulation and Curd Separation
The Role of Rennet and Acid
At the heart of cheese-making is something called coagulation, where liquid milk turns into solid curds. This happens thanks to either rennet or acid. Rennet, whether from animals, plants, or microbes, works by clumping the milk proteins together into a gel-like curd. It's often used for cheeses like cheddar or mozzarella, leading to a firm, smooth texture.
Acids, like citric acid, vinegar, or lemon juice, also cause milk to curdle, but they do it faster and create a softer, more delicate curd. This method is common for fresh cheeses like ricotta, paneer, and queso fresco. Knowing whether to use rennet or acid helps you pick the right path for your chosen cheese. Both are simple ways to start making milk into delicious cheese.
Cutting the Curd: Shaping the Cheese
Once your milk has coagulated and formed a solid curd, the next step is to cut it. This might sound strange, but it's really important for the final texture of your cheese. You use a long knife or whisk to slice the curd into small cubes or pieces. The size you cut them determines how much whey will drain from the curds.
Smaller cuts mean more surface area, so more whey drains out, resulting in a drier, firmer cheese. Larger cuts keep more moisture in, leading to softer, creamier cheeses. This simple action helps you control the texture, from a crumbly feta to a firm cheddar. It's a crucial step that directly impacts your cheese's personality.
Draining and Salting: Developing Flavor and Preservation
After cutting, the curds need to separate from the whey, which is the yellowish liquid left behind. This "draining" step is usually done by letting the curds sit in a cheesecloth-lined colander. As the whey drains away, the curds become firmer and more concentrated. This process helps create the texture you want.
Salting is another key part of making cheese. Salt does a few things: it adds flavor, helps remove more moisture, and acts as a natural preservative. It also slows down the growth of unwanted bacteria. You can add salt directly to the curds, or soak the finished cheese in a saltwater brine. The right amount of salt can truly make your homemade cheese sing.
Elevating Your Cheese: Advanced Techniques and Flavors
Introduction to Aging: Developing Complex Flavors
While many beginner cheeses are eaten fresh, some of the most exciting flavors come from aging. Aging cheese means letting it sit for weeks, months, or even years in a controlled environment. During this time, enzymes and microbes work their magic, breaking down fats and proteins. This process creates the complex, deep flavors and distinct rinds that aged cheeses are known for.
For home cheesemakers, basic aging involves keeping cheese at a cool, consistent temperature with proper humidity. You might store it in a cool basement or even a dedicated "cheese cave" (a mini fridge adjusted for the right conditions). Even short aging periods can transform a simple fresh cheese into something with much more character. This is where your cheese-making craft truly starts to grow.
Infusing Flavors: Herbs, Spices, and More
Making cheese at home gives you endless chances to get creative with flavors. You can add herbs like chives or dill to fresh cheeses for an instant burst of taste. Spices like black pepper, paprika, or even chili flakes can give your cheese a spicy kick. Think about adding dried fruits, garlic, or sun-dried tomatoes to your curds before pressing.
These flavor additions are best introduced during the draining or pressing stage, or kneaded into the curds before shaping. Experiment with different combinations to create unique cheeses that reflect your taste. This is where your homemade cheese becomes truly special and unlike anything you can buy.
Troubleshooting Common Cheese-Making Issues
Even experienced cheesemakers run into problems sometimes. What if your curd doesn't set? Often, this means your milk wasn't warm enough, or your rennet or acid wasn't fresh or strong enough. You might try adding a little more rennet or acid, making sure to gently mix it in. If your cheese is too crumbly or too soft, it might be due to incorrect cutting of the curd or insufficient draining.
Don't let these minor setbacks discourage you. Cheese making is a learning process. Take notes, adjust your methods, and remember that every batch, even a less-than-perfect one, teaches you something new. Many "mistakes" are still edible and tasty, just not exactly what you planned.
The Sweet Taste of Success: Enjoying Your Homemade Creations
Serving Suggestions and Pairings
You've made cheese at home—now it's time to enjoy it! Fresh ricotta is wonderful swirled into pasta sauces, spread on toast, or topped with berries and a drizzle of honey. Your homemade mozzarella shines in a classic Caprese salad with fresh tomatoes and basil. Paneer can be cubed and added to curries, while queso fresco crumbles beautifully over black bean tacos.
Consider pairing your cheese with complementary flavors. A mild, fresh cheese often goes well with crisp apples, juicy pears, or a light white wine. Firmer cheeses might enjoy stronger crackers, olives, or a bolder red wine. The possibilities are truly endless, and discovering your favorite combinations is part of the fun.
Storage and Shelf Life
Proper storage is key to keeping your homemade cheese fresh and tasty. Most fresh cheeses, like ricotta or queso fresco, should be stored in an airtight container in the refrigerator and eaten within a few days to a week. They don't have the preservatives of aged cheeses, so freshness is important.
For cheeses like mozzarella, storing them in a light brine can keep them fresh longer, sometimes up to two weeks. Always use clean containers and make sure your cheese isn't exposed to open air, which can cause it to dry out or grow mold. If you see any odd colors or smells, it's best to discard it.
The Satisfaction of Self-Sufficiency
Making cheese at home is more than just a kitchen task; it's a deeply rewarding experience. You get to control every ingredient, ensuring your cheese is free from unwanted additives and bursting with fresh flavor. The cost savings are a nice bonus, especially for specialty cheeses. But the biggest reward is the feeling of creating something delicious with your own two hands.
From a simple pot of milk, you’ve crafted a food staple. It’s a return to an ancient skill, a taste of self-sufficiency that brings immense pride. So, go ahead, gather your ingredients, and begin your journey. You'll be amazed at the wonderful cheeses you can create, all from the comfort of your own kitchen.
3 of the Top DIY Cheese Making Kits Available on Amazon
We hope you find your next awesome thing from the list below! Each product was independently selected by our editors. Some may have been sent as samples for us to fiddle with, but all opinions in this article are our own. Oh, and FYI — AnnesAnalytics may collect a share of sales or other compensation from the links on this page if you decide to buy something (that's how we stay in business). Reviews have been edited for length and clarity. Enjoy finding your next awesome thing.
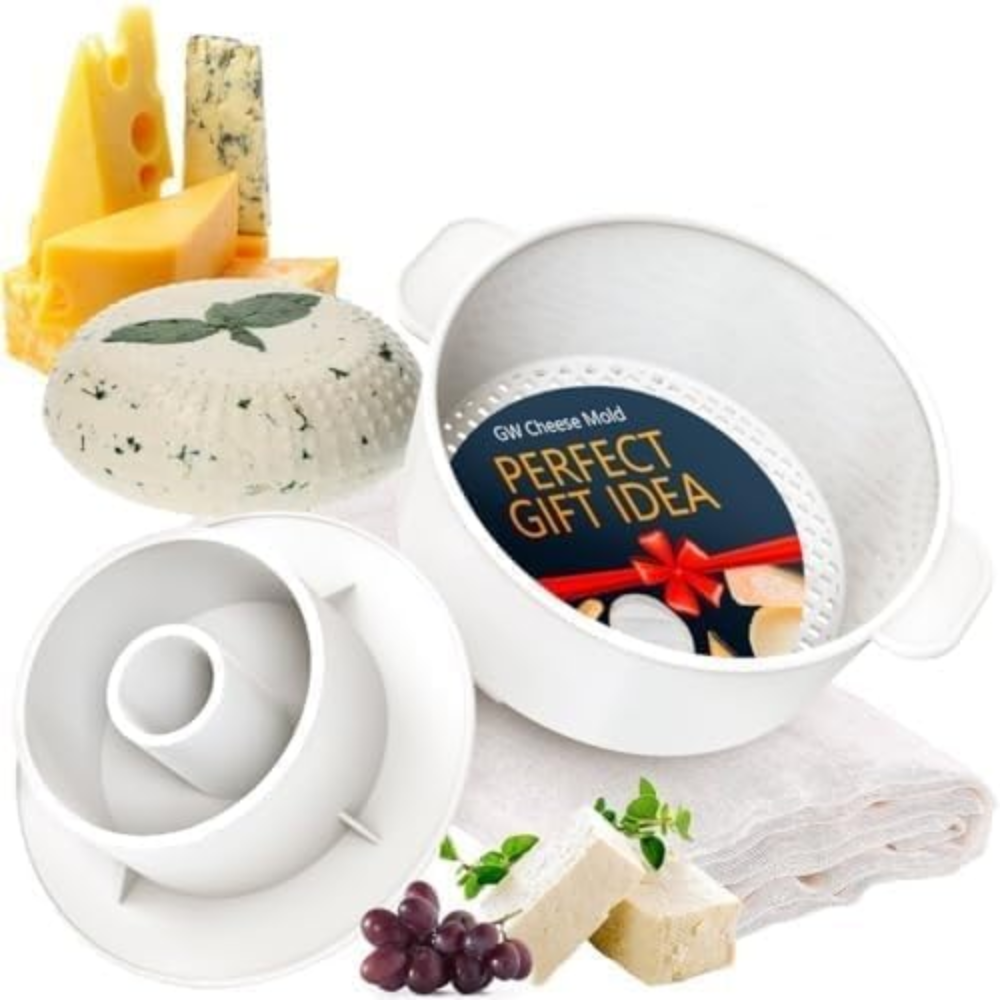
Grand Way Cheese Mold with a Follower and Cheesecloth – Cheese Making Kit
Reusable Cheesecloth – 100% Cotton Cloth for Straining – Paneer Maker
Why We Love This
Your complete cheese-making kit includes a generous 39x36 inch piece of 100% cotton cheesecloth. It's perfect for straining cheese curds, wrapping cheese for aging, and general cooking needs. This cloth is washable and can be used again and again. While the included mold is best for semi-hard and hard cheeses, the versatile cheesecloth is useful for making all types of cheeses, from soft to hard varieties.
Encouraging Review
"Simple to use and does the job very nicely!! Dishwasher safe and the cheesecloth is wonderful and can be washed out and used again and again!" Amazon Review by #1teacher

The Ultimate Cheese Making Kit - DIY Cheese Maker
10 Different Cheese Mozzarella, Mascarpone, Feta, Ricotta Cheese - Cheese Making Supplies Include Rennet for Cheese Making & Booklet
Why We Love This
You can now make your own cheese with ease. This ultimate cheese making kit lets you create delicious cheese in under an hour. It includes everything needed for success, like molds, herbs, spices, and a simple recipe book. You'll be amazed at how easy it is to whip up your favorite cheese at home.
Encouraging Review
"I used this in the classroom during a chemistry unit! What an awesome kit and experience for my students! I think this also would make a great gift! All of the recipes and materials make this a really good buy because you can make several different cheeses and it is accompanied by a recipe book of a variety of cheeses! So fun for my students, I highly recommend!" Amazon Review by Amazon Customer

Basic Beginner Cheese Making Kit
Mozzarella, Burrata, Burricota, Chevre, Ricotta, Mascarpone & Butter!
Why We Love This
Whip up fresh cheeses at home with this all-in-one kit. You'll get recipes for ricotta, mascarpone, cottage cheese, chevre, cream cheese, and mozzarella. Instructions are simple to follow. It even includes a reusable cloth for draining curds. All ingredients come in handy resealable bags.

Encouraging Review
"This kit is great! We hosted a cheese making party and bought several of these for my friends and I to use. The instructions are clear and this kit has almost everything you need to make Mozzarella or Burrata. The only thing you need to buy is milk (and a good mixer). Who knew it was so easy to make cheese!?! My nieces are getting this kit for Christmas." Amazon Review by Mimi
Conclusion
Making cheese at home is a journey that starts with simple ingredients and leads to remarkably delicious results. By understanding the basics of milk, using the right tools, and following straightforward techniques, you can truly demystify this ancient craft. From the first step of coagulation to the final draining and salting, each part helps you create your own artisanal cheeses.
The real reward is not just the food itself—a creamy ricotta or a perfectly stretchy mozzarella—but also the new skill and the satisfaction of doing it yourself. You've turned humble milk into something extraordinary, proving that the art of making cheese is indeed within your reach. So, grab your ingredients, enjoy the process, and get ready to taste the unmatched flavor of cheese made with your own hands.
Frequently Asked Questions About Homemade Cheese
Is making cheese at home difficult?
No, it's surprisingly simple! Many cheeses require just a few ingredients and basic steps. You'll be surprised how easy it is.
What basic ingredients do I need to make cheese?
You typically need milk, a starter culture, and rennet. Sometimes salt is also used. These are readily available at most grocery stores.
How long does it take to make cheese?
The time varies greatly. Simple cheeses might be ready in a day. Others, like aged cheddars, can take months.
What kind of milk is best for homemade cheese?
Pasteurized milk works well for most beginner recipes. Raw milk can be used, but requires extra care due to bacteria. Whole milk generally yields richer results.
Can I make cheese without special equipment?
Yes, you can! A large pot, a thermometer, and cheesecloth are usually enough. Many common kitchen tools can be adapted.